On Monday, I showed you one of my favorite gift-wrapping tools–how to make a gift bow from magazine paper. Unfortunately, I felt that post didn’t really give you easy, step-by-step instructions and ultimately, I didn’t think it was my best work. I don’t like that feeling, so as I was doing some gift-wrapping today, I decided to take another stab at it. I think the results are not only more beautiful and more versatile, but much easier to recreate. I hope this will be helpful and fun!
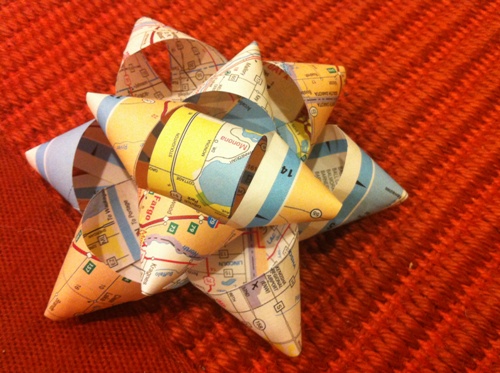
Normally I like to wrap gifts in fabric, recycled paper, or tissue paper, but this year, with all our stuff in moving boxes, I didn’t have those options. What I did have in spades were maps–including maps for places we don’t intend to return to for a while.
I had only made these bows from magazine pages until now, but I love the look of maps, so I was excited about this. Here’s how I did it (and you can, too!):
Step 1: Cut seven 1″ strips
You’ll need seven 1″ strips cut from your map (or other paper, of course!): three 11″ strips, two 8.5″ strips, and one 4″ strip. Note that this is fewer strips than I used last time–I think the resulting bow turned out a lot cleaner and prettier.

Step 2: Fold the strips into six figure-8s and one loop
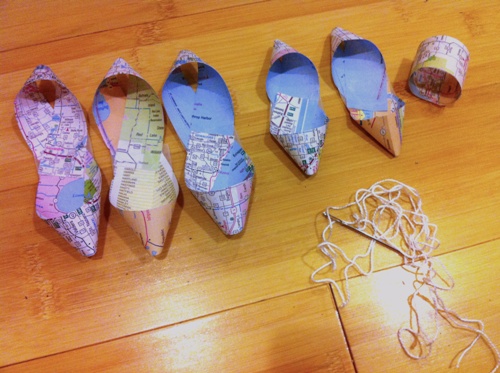
Just like I explained last time, fold the long strips into figure-8s by twisting the ends around to meet in the center and securing them with a piece of tape. Do this for each of the five long strips. Wrap the short strip into a loop and secure it with tape, too. Your pieces should look like this:
Step 3: Assemble the bow
Monday I explained how to do this with staples, but today I tried using a needle and thread, and I love it–here’s why: first, it can be difficult to staple these pieces without creasing or tearing them; second, if you use thread, you can add a quick loop at the end to make your bow into a sweet hanging holiday ornament.
If you’d rather use staples, feel free to follow the instructions from Monday. If you want to use thread, simply thread a thick, sharp needle with embroidery floss, tie a knot at the end of the thread, and poke the needle through the middle of each of your figure-8s, starting with the three large ones, then the two smaller ones. Pull the needle through and push it through one side of the loop piece.

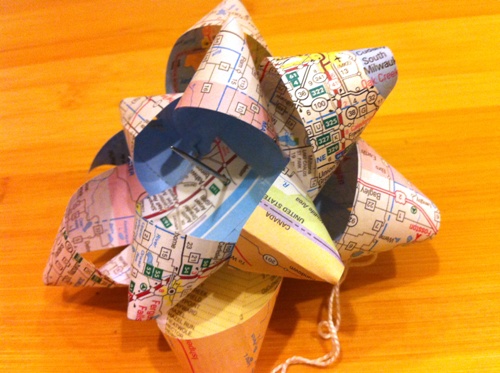

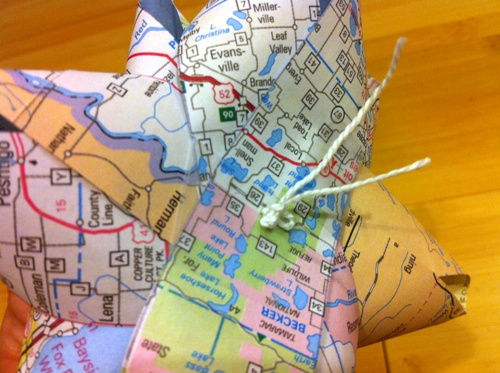
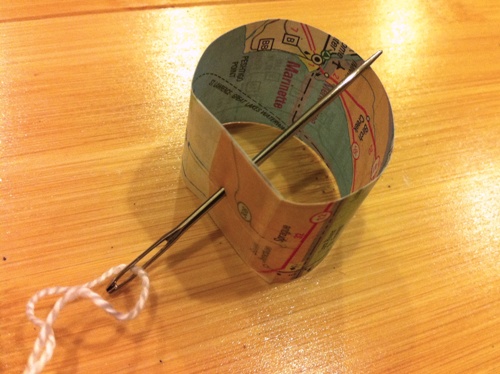
Bring your pieces together and spread them out evenly to form the bow shape you prefer. Once everything is in place, push the needle back through, making a different hole near the first one–the twoholes will ensure that your pieces don’t spin, that they stay where you want them.
Tie a knot at the back of the bow to secure the thread.
If you want to use the bow as a hanging ornament, simply make a loop from the rest of your thread and tie the loop off with a knot. For the ornament, I recommend also sticking the loop to the back of the bow with a piece of tape to keep the bow upright when it hangs.

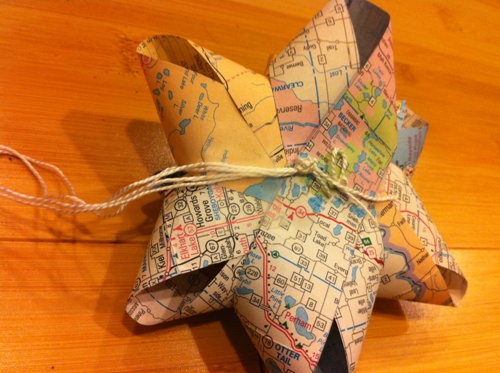

If you want to use the bow on a gift, just make a loop of tape on the back and stick it to your gift. Beautiful!

I had so much fun gift-wrapping with used maps this year–here are some other gifts I wrapped today; I’ll be posting about their contents over the next few days. Stay tuned!

Bonus: If you want to make gift bags like these from maps (or other pretty paper), here’s how:
Cut a large piece of the map/paper–large enough to wrap a box about the size you’d like the bag to turn out.
Fold one edge over about 1-2″–this will make a nice clean edge around the top.
decide how wide and thick you want the bag to be–in my case, 7″ wide and 2″ thick.
Add those numbers and double the sum (7+2=9, 9×2=18); make a loop out of the paper that’s as big around as that number (18″ in my case).
Fold the loop flat in half (9″ across, in my case), and crease both sides.
Now make another crease the width of the bag (7″ in my case) from one side, and fold the paper at that crease–you’re basically making the loop into a box shape.
Turn your box shape on its side, and close the bottom edge by folding it the same way you would wrap a box (fold in the sides, fold the bottom up and the top down over it, and tape it securely).
It might help to insert a box about the size of your bag into the bag, and “wrap” the bottom edge as though you were wrapping a gift. Then remove the box.
Stand your bag upright and place a piece of tape on the inside of the bottom to secure it.
There you have it!


Leave a Reply